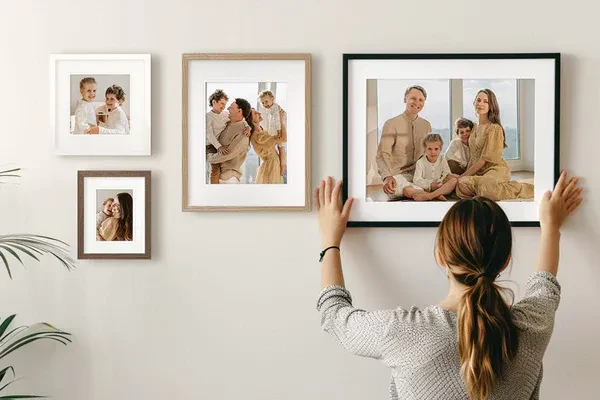
Before you embark on your picture hanging journey, it's essential to gather the right tools. Having everything prepared will make the process smoother and more enjoyable. Start with a tape measure, as this tool is invaluable for ensuring that your artwork is hung at the perfect height and distance from other pieces.
Next, you’ll need a level. This device will help you hang your pictures perfectly straight, avoiding that bothersome crooked look. A spirit level is easy to use and is a must-have for any picture hanging project. Depending on your preference, you might also consider a laser level for precise alignment across multiple pieces.
Don't forget to grab a pencil! A simple pencil will allow you to mark the wall where you plan to hang your photos. This is particularly helpful when arranging multiple pieces in a gallery wall style. Additionally, you will need the appropriate hardware, like hooks or nails, to support the weight of your artwork.
Finally, having a hammer on hand will make it easier to drive your nails or hangers into the wall. If you are uneasy about hammering directly into your wall, think about using adhesive strips designed for picture hanging. With these tools by your side, you're well on your way to mastering picture hanging like a pro!
Choose the Perfect Wall Spot
Choosing the right wall spot for your art is a crucial step in the process of picture hanging. It’s not just about finding a blank space; it's about selecting a location that complements both your artwork and the overall feel of the room. Start by considering the size and shape of the piece you want to hang. A large painting might be better suited for a grand wall, while smaller prints can be grouped together to create a gallery effect.
Next, think about the height at which you’ll hang your pictures. A common guideline is to hang artwork at eye level, which typically means positioning the center of your piece about 57 to 60 inches from the floor. This height can vary depending on your ceiling height and the furniture in the room, so take some time to step back and assess how your artwork will interact with its surroundings.
Lighting is another important factor in choosing the perfect wall spot. Natural light can enhance the colors and details of your art, but bright, direct sunlight might cause fading over time. Consider how light changes throughout the day and what it does to your artwork. You may want to position your pieces where they catch gentle light without being directly exposed.
Finally, think about the flow of the space. Picture hanging should not only be about aesthetics but functionality as well. Ensure that your artwork is not obstructing walkways or interfering with the furniture layout. Instead, aim for creating a harmonious balance that draws the eye and enhances the room's ambiance, making each piece a talking point in your home.
Measure and Mark Picture Placement
Before you start the exciting process of picture hanging, it’s essential to measure and mark the placement of your artwork. This step ensures that your pictures are hung at the right height and are evenly spaced, creating a visually appealing arrangement. Start by deciding where you want to place your pictures on the wall. It’s often best to hang art at eye level, which is typically around 57 to 60 inches from the floor. Measuring this distance will help you determine where to mark your first point.
Once you have identified the height, use a pencil to lightly mark that spot on the wall. If you’re hanging multiple pictures, consider how far apart you want them to be. A common recommendation is to leave 2 to 5 inches between frames. Use a measuring tape to mark the spot for each picture, ensuring you maintain consistent spacing. This is especially important in a gallery-style arrangement, where symmetry plays a crucial role in effective picture hanging.
After marking your points, step back and visually inspect your layout. Sometimes even the slightest adjustments can make a significant difference. Utilize painter’s tape to create a temporary outline of each picture on the wall. This allows you to see how the arrangement will look before making any permanent changes. Take your time with this step; it’s an important part of the picture hanging process that can greatly enhance the overall aesthetic of your space.
Hang Your Art with Confidence
First, consider the layout of your wall and the pieces you want to display. A good rule of thumb is to hang artwork at eye level, which is typically around 57 to 60 inches from the floor. Measure the height of your picture or frame and find the center point. This will help you position it accurately. If you’re hanging multiple pieces, arrange them on the floor first to see how they work together before committing to any nails or hooks. This way, you can experiment and find the perfect balance.
Next, use the right hardware for your picture hanging needs. Heavy frames may require anchors or wall studs for extra support, while lighter pieces can often be hung with picture hooks or adhesive strips. Always ensure that the weight of your art matches the strength of your hanging method. This will not only keep your artwork secure but also provide peace of mind as you admire your display.
Lastly, don’t be afraid to get creative with your arrangements! Consider mixing different frame styles, sizes, and orientations to create an eye-catching gallery wall. Picture hanging is not just about function; it’s also an opportunity to express your personality and style. So go ahead, unleash your inner artist and hang your art with confidence!
